The following outlines some of the ways you can generate high quality graphics from IQmol.
Taking Snapshots
The easiest way to obtain an image is to take a snapshot via the File -> Save Picture menu option. By default, the image will render the same size as the Viewer window, so if you enlarge the Viewer you will get a higher quality image. Alternatively, you can render the image with a higher number of pixels by increasing the Width and Height fields in the Image settings dialog that appears when you take the picture:
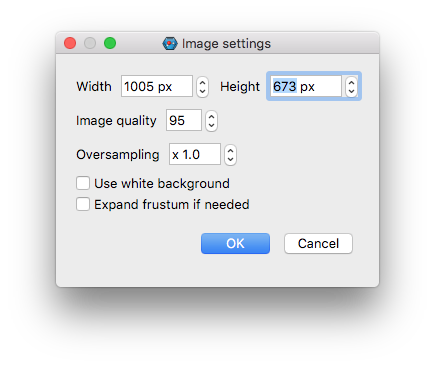
Multiplying the given values (which initially correspond to the Viewer window width and height) by 2-4 will give improved image results. Unfortunately the oversampling functionality is not working and does not alter the picture quality.
Capturing PNGs gives better results than for JPGs as can be seen in the top two frames in the image below. The images have been zoomed in and the JPG on the right shows artefacts around the colour boundaries which are not visible in the PNG. The PNG capture creates much larger files (2.7MB compared to 44 KB for the JPG), however I have found that if I open the image in Preview (OS X) and export to PNG I get a file which appears almost identical (bottom left frame below) but with a much smaller file size (162KB). The final fame shows an enlargement of a JPG image that was captured using 4x the number of pixels in each direction and which gave a file size of 400KB.
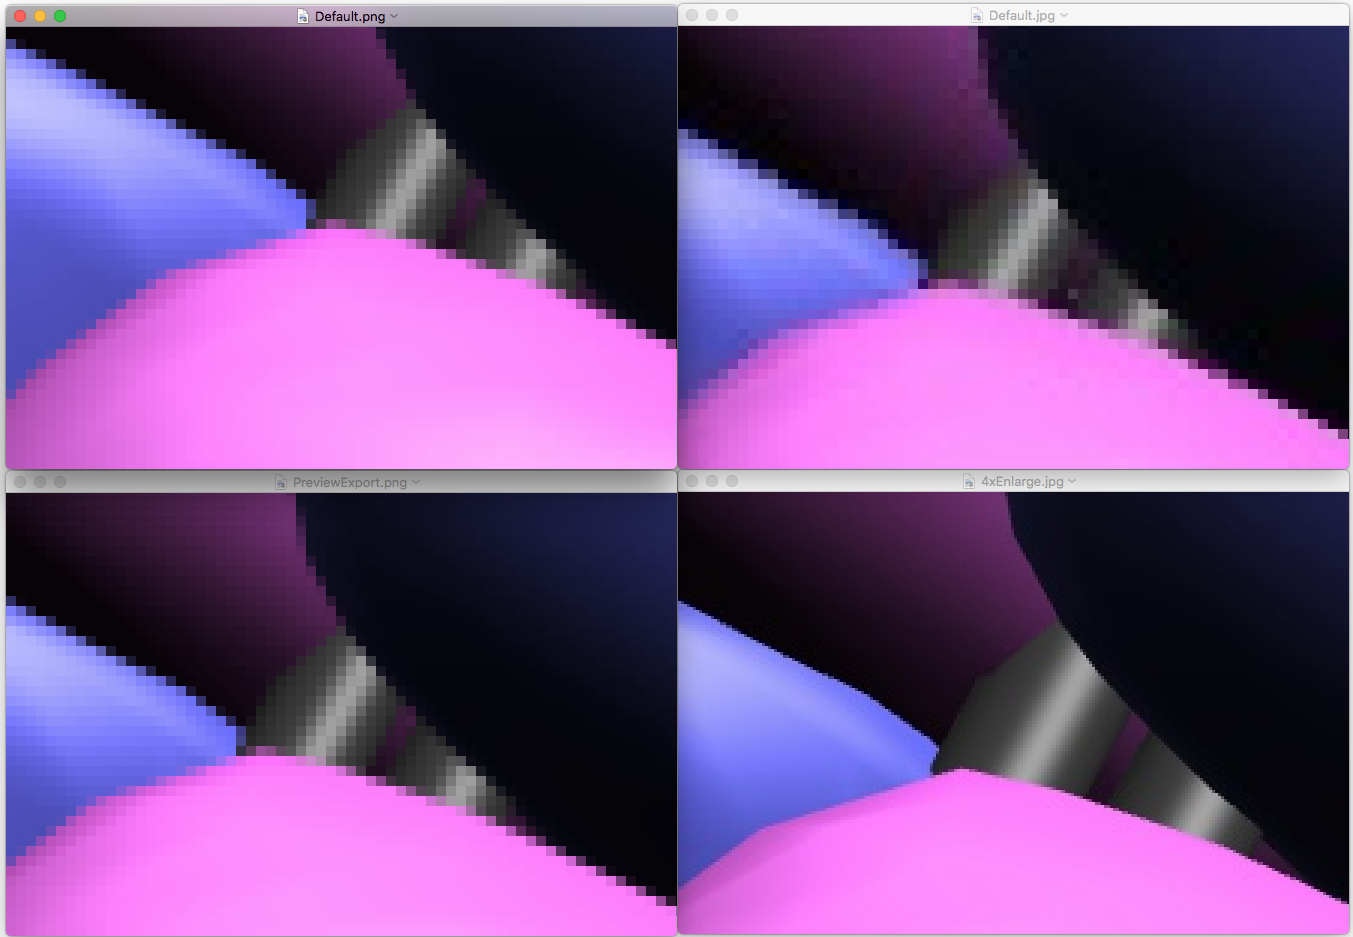
All these images were generated using the default mesh quality and at this zoom level the last jpg image clearly shows corners on the surface. Smoother surfaces can be obtained by increasing the mesh quality when generating the surface.
The snapshot images will include the background. It is very difficult to generate a transparent background image using OpenGL, so If you do not want the background you will either need to remove it in Photoshop/Gimp, or use POV-Ray.
POV-Ray Output
IQmol is able to generate scene files for POV-Ray renderers. This allows for almost unlimited resolution and visual effects. To generate a scene file, use the Display -> Appearance menu option to bring up the Appearance dialog and click on the POV-Ray tab at the top.

Several preconfigured textures and effects are available via the combo boxes in the Textures panel of the dialog, and these will allow you to easily generate scene files with eye-catching results. IQmol is not able to render the scene file, for this you will need to download a rendering program, for example from povray.org. Example renders for each of the effects are displayed in the Sample frames.
Exporting Cube Files
If the graphics generated by IQmol are insufficient for your purposes, it is possible to export the volumetric data generated by IQmol into a cube file for subsequent processing. Cube files are a standard file format that is accepted by several other programs. To export these data, you first need to generate an MO or density surface, if you then right-click on the Canonical Orbitals item in the Model View, there is an option to Show Grid Info. Clicking on this brings up a window similar to the following:
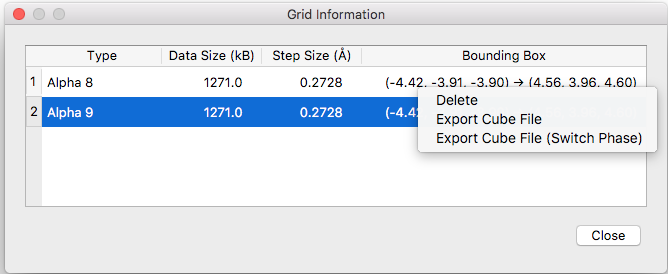
The window will list all the available volumetric data that has been computed using the MO coefficients. Right-clicking on one of the items in the list brings up a context menu that has the Export Cube File option. The voxels in the cube file will be the same size as indicated by the step size and if higher resolution is required the mesh quality should be increased when plotting the surface.
Spectra
Images of the spectra generated in the frequencies and excited states can be exported by right-clicking on the image which brings up the option to save the image. These images can be saved as PDFs which give very good resolution.